
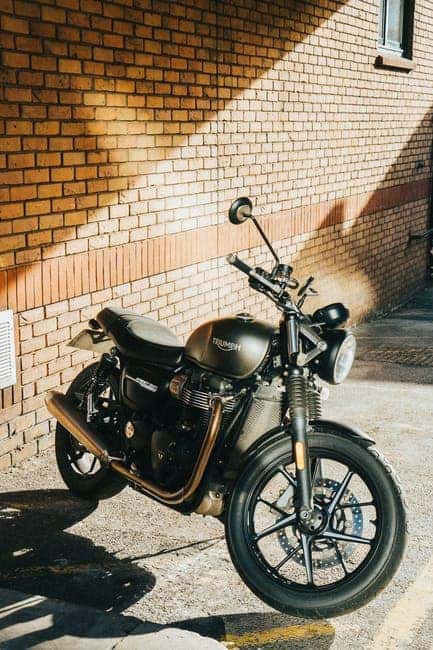
How to Clean Your Motorcycle Like the Pros
How to Clean Your Motorcycle Like the Pros
Do you want to know some of the best motorcycle cleaning tips?
A motorcycle is a machine that needs proper care and maintenance. If you don’t take care of it, it will break down or wear out prematurely. Any rider needs to learn how to properly clean their bike so they can keep it running smoothly and looking good.
We’ve put together some motorcycle cleaning tips to help you clean like the pros. Keep reading to learn everything you need to know.
Step 1: Cover Exhaust Pipes
The exhaust pipes on your bike are very hot, so it’s important to be careful while cleaning them. This is just a precaution to prevent you from getting burnt and to keep water out.
Tips:
Use a rag to cover the pipes while you clean them, and check their temperature throughout the cleaning process. When washing with water, let it soak until it gets warm before you start scrubbing if they are hot from riding or from sitting in the sun. Warm rags will also be more effective at removing
Step 2: Washing
When you wash your bike, it’s important to keep the tires away from water. You don’t want them to slip or lose their traction. If they do, you could crash and get injured.
Another thing to consider is what kind of soap to use. Most experts recommend dishwashing soap because it won’t strip off protective oils from the paint.
Concentrated degreasers also work well on surfaces that get dirty often, such as off-road bikes. Degreasers are more likely to damage delicate finishes on a bike, so they aren’t recommended for use on a showroom model or vintage ride.
Tips:
Don’t try to clean the bike when it’s cold out. The hot sun and warm water will loosen dirt and make it easier to remove. If it’s too cold outside, wait for a warmer day and use a heater if necessary to keep warm while cleaning.
Step 3: Inspecting
Once you’ve finished washing your bike, take a long look at it to inspect for any damage. Check the paint and pay particular attention to any scratches or chips you could’ve missed when you were doing the washing.
If there is damage, take care of it as soon as possible. You don’t want to experience those problems during your next ride because even minor ones can cause serious problems.
Tips:
When inspecting, check for any oil or gas leaks, cracks in the manifolds or engine block, etc. If you see anything, take care of it as soon as possible to prevent further damage.
Step 4: Washing the Tires
The tires on your bike will kick up dust as you’re riding if they aren’t clean. This can cause black streaks down your paint job. Always be sure to wash the tires as part of your bike cleaning routine.
Tips:
The best way to do this is with dishwashing soap. Scrub the rubber lugs vigorously before you rinse them thoroughly. If there’s any dirt or grime that won’t come off, try using a commercial tire cleaner on it instead of dish soap because it will be more effective at removing stubborn stains.
Step 5: Washing the Exhaust Pipes Again
It’s important to make sure you get all the soap off the pipes after washing them because soap left on will cause rust and other damage. If you can’t get it off with rags or water, try using a dry rag and polish (like chrome polish) for a thorough cleaning.
Tips:
If your pipes are still hot from being on the bike, wait a while after removing them before you give them a second wash with soap and water to let them cool down. Also, be sure to cover them with a rag or your hand while they’re cooling off so no water gets inside until they have completely cooled off.
Step 6: Cleaning the Seat
The seat of your motorcycle is another area that will get dirty quickly unless it’s regularly cleaned. Never use solvents on the seat because they can damage leather seats and leave unwanted marks on vinyl ones. The best way to clean them is with saddle soap or saddle cleaner spray.
Tips:
Spray the cleaner onto a cloth and work it into any stains you find. Once you’ve cleaned them, wipe them down with a clean rag to remove any streaks or dirt left behind from applying the spray to your cloth.
Step 7: Cleaning the Grips
It’s best not to use solvents to clean the grips of your motorcycle because they can damage them. To keep leather and vinyl grips in good condition, simply wipe them down with a damp rag to remove any dirt or grime that may have built up on them throughout the day.
Tips:
Keep water off the metal parts to prevent rusting and corrosion. If there’s any rust on them, you should be able to get it off with a rag and some WD-40 to avoid having any build-up in the future.
Step 8: Waxing
Next, wax your motorcycle after you’ve finished inspecting it. After washing and drying, apply a light coat of protective carnauba wax across the paint with a clean, soft cloth. Use only a small amount because too much wax will end up on the pads of your fingers instead of on the bike.
After applying the wax, buff it with a clean cloth until your motorcycle shines. Don’t use any harsh chemicals or abrasives on the paint because that could damage it.
You should wax your bike at least once every two weeks for the best results. If you go longer than that without applying carnauba wax, apply another coat of wax at the two-week mark.
Tips:
Apply a light coat of wax to all surfaces you cleaned in steps 2, 3, and 4. Use only a small amount for the best results. You can also use specific kinds of spray wax on your bike’s tires as well.
Step 9: Applying New Lubrication
After washing and drying your bike, what you do next will depend on the type of oil and lubricants your motorcycle requires.
There are two types: wet and dry. Wet lubes provide a good deal of protection in humid conditions and keep certain components cool while they’re running. Dry lubes don’t attract dust which helps protect against rust. Some motorcycles need both types to run well.
Tips:
If you have a liquid form of lube, write down the instructions for applying it to your bike because they’re different for each one. The instructions usually come with a can or bottle of lube so keep them close by once you purchase it so you don’t forget how much to use. You should also follow the instructions on your motorcycle regarding oil changes.
Step 10: Protecting Your Investment
Buying a motorcycle is an investment. When you’re done, apply a sealant or coating to protect the finish on your bike from water, dirt, and road debris. Use a high-quality product designed for sealing motorcycles because lower-quality products can contain silicone or other chemicals that will strip the wax from your bike.
Re-wax after applying a sealant to maintain your shine. Be sure to choose carnauba wax and not a silicone product because the latter isn’t as effective and can damage the paint on your motorcycle if it’s applied too frequently.
After you’ve finished these steps, your bike will look better than ever!
The Most Commonly Missed Spots When Cleaning a Motorcycle
Motorcycle maintenance is important, otherwise, you’ll find yourself having to replace motorcycle parts after a short time.
The Motorcycle’s Frame: First, clean off as much of the debris as you can from around the frame. Spray some motorcycle cleaner on a rag and work it into any cracks or crevices to loosen grime so you can wipe it away.
The Engine: To clean the engine, use a tube brush to clean the crevices and a rag to dry them off. If you have a chain, spray it down with motorcycle cleaner and wipe it until all the grime has come off.
The Exhaust: Clean the exhaust by applying spray lube to a hose or brush that’s attached to your garden hose. Turn on the water and work off all the grime. Get as close to the outside of the exhaust as possible, avoiding the rubber seals around it.
Hinges and Handles: Clean your bike’s hardware by spraying some WD-40 onto a rag and wiping off any debris that has built up on them throughout the year. After you’ve wiped everything down, use another damp rag to wipe everything off.
The Bottom of Your Motorcycle: To clean the underside of your motorcycle, start by removing the floorboard (if applicable). Then clean the scuff patterns with some cleaner and wipe away any crud.
The Best Times To Clean a Motorcycle
Depending on where you live and how often you ride, you may need to clean your motorcycle several times a week or once every few months. When it comes to washing your bike, there is no rule of thumb when it comes to the best times.
However, certain times may be more ideal than others. For example, if you live in an area where it’s very snowy during the wintertime, you may want to clean your motorcycle after every ride so the salt and grime don’t take a toll on your bike. If you live somewhere with little precipitation throughout the year though, you may be able to go for longer periods without washing your motorcycle.
Most days, a quick once-over with a damp towel will do the trick. This is especially true if you’re using a type of cleaning fluid designed specifically for motorcycles or bicycles – they’ll get your bike cleaner and require fewer wipes down the line. However, you should still give your motorcycle proper washing at least once or twice per week, and never skip it because of the weather.
Motorcycle Cleaning Like a Pro Today
Now you should know everything you need to know about motorcycle cleaning like a pro and how often to do it. These steps will help you maintain the look and finish of your bike throughout the year, so if you take good care of it now, it’ll take care of you when the road gets rough!
For more helpful tips, contact us!
0 comment(s) so far on How to Clean Your Motorcycle Like the Pros