
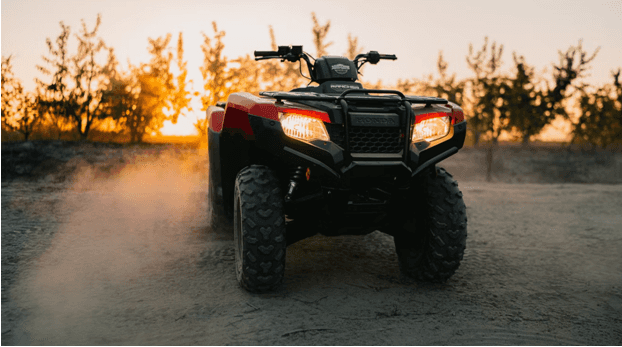
4 ATV Maintenance Tasks and Repairs You Can Do Yourself
ATVs are sturdy machines that are built to last for many years. However, they require regular maintenance and repairs to function at their best. After all, these specialty vehicles are made up of dozens of moving parts, and these need to be kept in great shape to continue working well.
While some ATV maintenance and repair tasks require the assistance of a professional mechanic. There are actually numerous types of maintenance tasks and repairs that you can perform by yourself. Doing such tasks yourself can help you save money and ensure your ATV remains in great condition before each ride.
Let’s look at seven essential ways to maintain and repair your ATV yourself.
1. Washing the ATV
Washing your ATV may sound like an obvious maintenance task. However, few people understand the importance of doing this regularly.
ATVs accumulate dirt and other particles across their external components while riding. These items can get lodged between parts while riding through dry environments. Your ATV is also likely to get caked in dirt and small rocks if you ride it in wet and muddy environments frequently. In either case, it is vital to wash your ATV after each ride.
How to Wash Your ATV
The steps for washing your ATV properly are described as follows:
1. Take Your ATV to a Good Location
The first step is to take your ATV to a good location where you can wash it freely without worrying about creating a mess. A backyard or an open space in nature would be ideal for this. You should avoid washing your ATV in your garage as the dirt that washes off may clog the drain.
2. Turn Off Your ATV and Wait for It to Cool
Next, you should turn off your ATV and wait until it has cooled down. Your ATV doesn’t have to be at room temperature when you start the washing process. However, you should ensure the engine has been turned off a minimum of ten minutes in advance.
3. Cover the ATV’s Sensitive Parts
Certain ATV components may get damaged after being exposed to water, so you should ideally cover them up before starting the washing process. This includes the engine and the ignition switch.
4. Get Rid of Large Muddy Chunks
You can then start spraying water on your ATV’s external components. During this step, it is best to target the large chunks of mud that may have accumulated on your ATV during your last ride. You should be able to remove such chunks using a hose and a hard brush.
5. Wash the Rest of the ATV
Next, you can wash the rest of the ATV using a truck washing soap and a hose. If your ATV has leather seats, you can clean it using a leather cleaning solution. Once this is done, you should leave your ATV in a sunny place to dry off.
2. Changing Your ATV’s Oil
Your ATV’s oil can accumulate dirt and sludge over time, and this can impact its performance. ATV owners are advised to change the oil on a new ATV after 25 hours of operation. They should then change it after every 100 hours of operation.
Some signs your ATV is in need of an oil change include:
- The engine has become noisier than usual.
- Excess shaking while the vehicle is idling.
- Ticking noises when the ATV is started up.
How to Change Your ATV’s Oil
The steps to change your ATV’s oil are follows:
1. Turn On The Engine
You should start by turning on their ATV’s engine and allowing it to run for ten minutes. This allows the oil to warm up for easier drainage.
2. Access the Drain Plug
Next, you should locate your ATV’s drain plug. This may be positioned under the ATV seat, you will need to remove it. You will then need to snap off a panel on the vehicle’s side and remove the bolts surrounding the drain plug cover. You should then be able to see the ATV’s drain plug near the bottom of the engine.
3. Drain the Oil
Next, you should place a drain pan underneath the engine before loosening the drain plug. The old oil should drip onto the pan. Once this oil has drained completely, you should be able to remove the filter.
4. Add Fresh Oil
You can now put your drain plug back in place and tighten it. Place a small amount of fresh oil onto a new oil filter and screw it in place. Next, you should place a funnel on top of the filter and pour in the new oil.
5. Turn on the Engine
The next step is to turn on the ATV’s engine and allow it to run for ten seconds. This helps the engine circulate the new oil. You can then check the oil level with the dipstick and decide if you need to add any more. If the oil level is acceptable, you can place the oil panel cover and ATV seat back on.
3. Checking Tire Pressure and Plugging Holes
An ATVs tires must get good traction to ensure they can traverse different types of terrain. Good tire pressure ensures that they can do their job well. You should look up the recommended tire pressure from their manufacturer and then check your tire pressure using an air compressor. You can then pump more air in to ensure the pressure levels are adequate.
It’s not uncommon for ATV tires to get punctured after repeated use. After all, these vehicles drive over objects such as fallen tree branches and sharp rocks regularly. If you believe one of your ATV’s tires has been punctured, you can seal the hole using a tire plug kit. This process can be completed at home, so you won’t need to worry about taking your ATV all the way to a mechanic to get it fixed.
4. Cleaning the Air Filter
All ATVs need an air filter to function properly. This filter blocks dirt, debris, insects, and other particles from entering the engine’s sensitive combustion chamber, and allows only clean air through. However, this also means your ATVs air filter will naturally get clogged over time.
You don’t need to clean this filter after each ride, but you may want to clean it regularly if you ride your ATV through sandy or dusty terrain frequently.
How to Clean Your ATV’s Air Filter
Most modern ATVs come with air filters made from foam and must be cleaned in a specific manner. This cleaning process is described as follows:
1. Locate and Remove the Air Filter
Your ATV’s air filter is likely located under the seat, so you should start by removing this seat. Once you have found the air filter, you should remove it and set it aside.
2. Wash the Filter
Next, you should put on a pair of gloves and fill a bucket with water. You can then pour a small amount of filter cleaning solution into the water and stir it.
Next, you can submerge the filter in the water-cleaner solution and rinse it. Be careful not to rinse the filter too hard as it may get damaged. Once all the embedded particles have been rinsed off, you can remove the filter and dispose of the water.
3. Let the Filter Dry
The final step in the cleaning process is to let the filter dry. You should ideally allow your filter to dry naturally. This means you should not use a hair dryer or place it in an industrial dryer.
You can also clean out your ATV’s air box while the filter is still trying. Use a small brush and gloves to get rid of any dirt or particles that may have made their way into this air box. Once your air filter has dried completely, you can place it back into the air box and replace your ATV seat.
Where Can I Purchase or Rent an ATV?
As you can see, there are numerous types of ATV maintenance tasks and repairs you can perform yourself. The tasks mentioned above are relatively straightforward and can be completed without the help of a mechanic. So consider keeping your ATV in tip-top shape by following this guide.
If you’re interested in purchasing or renting an ATV, please visit Westshore Marine. We offer numerous ATVs from leading manufacturers. Our staff are always eager to help new customers and can answer any questions you may have about ATVs. Please contact us to learn more about our selection of products or to receive advice on ATV repairs.
0 comment(s) so far on 4 ATV Maintenance Tasks and Repairs You Can Do Yourself